After being frustrated with DEVONthink’s sync, dealing with intermittent CloudKit/iCloud sync issues and the limitations of Bonjour (great, but only on the local network and blocked on many public networks when traveling), it was time for a change.
The good news? I’ve finally found a DEVONthink sync strategy I’m happy with.
I’m fully in control of the server, while using hardware (an always-on Mac Mini) I already had. No extra servers or subscriptions required.
The even better news? It took just minutes to set up.
How?
At first I had considered a local sync store, however that’s not supported for iOS devices.
Enter WebDAV: the runner-up in the sync game according to the DEVONthink community. It’s reliable and works for all devices. The downside is that if you rely on a WebDAV server hosted on a public cloud server the sync will be much slower than with Bonjour.
If you already own a NAS that supports WebDAV you can just use that. But in my case I have an always-on Mac Mini in our second home that I already use for offsite backups.
But when starting to explore the options for running a WebDAV server on the Mac it initially seemed quite daunting (setting up an apache server, etc). I didn’t want to take on a second job as a sysadmin, I just wanted a reliable and secure sync method for DEVONthink!
But thanks to a comment by @footlooseboss on MPU Talk I found WebDAVNav Server, a well-maintained Mac App that takes care of everything for you. It’s not just reliable and set up in a minute or two; it’s also free. (Though, tipping the developer is a classy move.)
I’ve already been using Tailscale (a super easy, Wireguard backed private virtual network for all your devices) for a long time, so no additional setup for me there. But even if you’re not already using it I’d recommend setting it up just for this purpose—it takes less than two minutes. It’s much more performant and secure than opening up a port and exposing it to the internet.
Here’s the game plan:
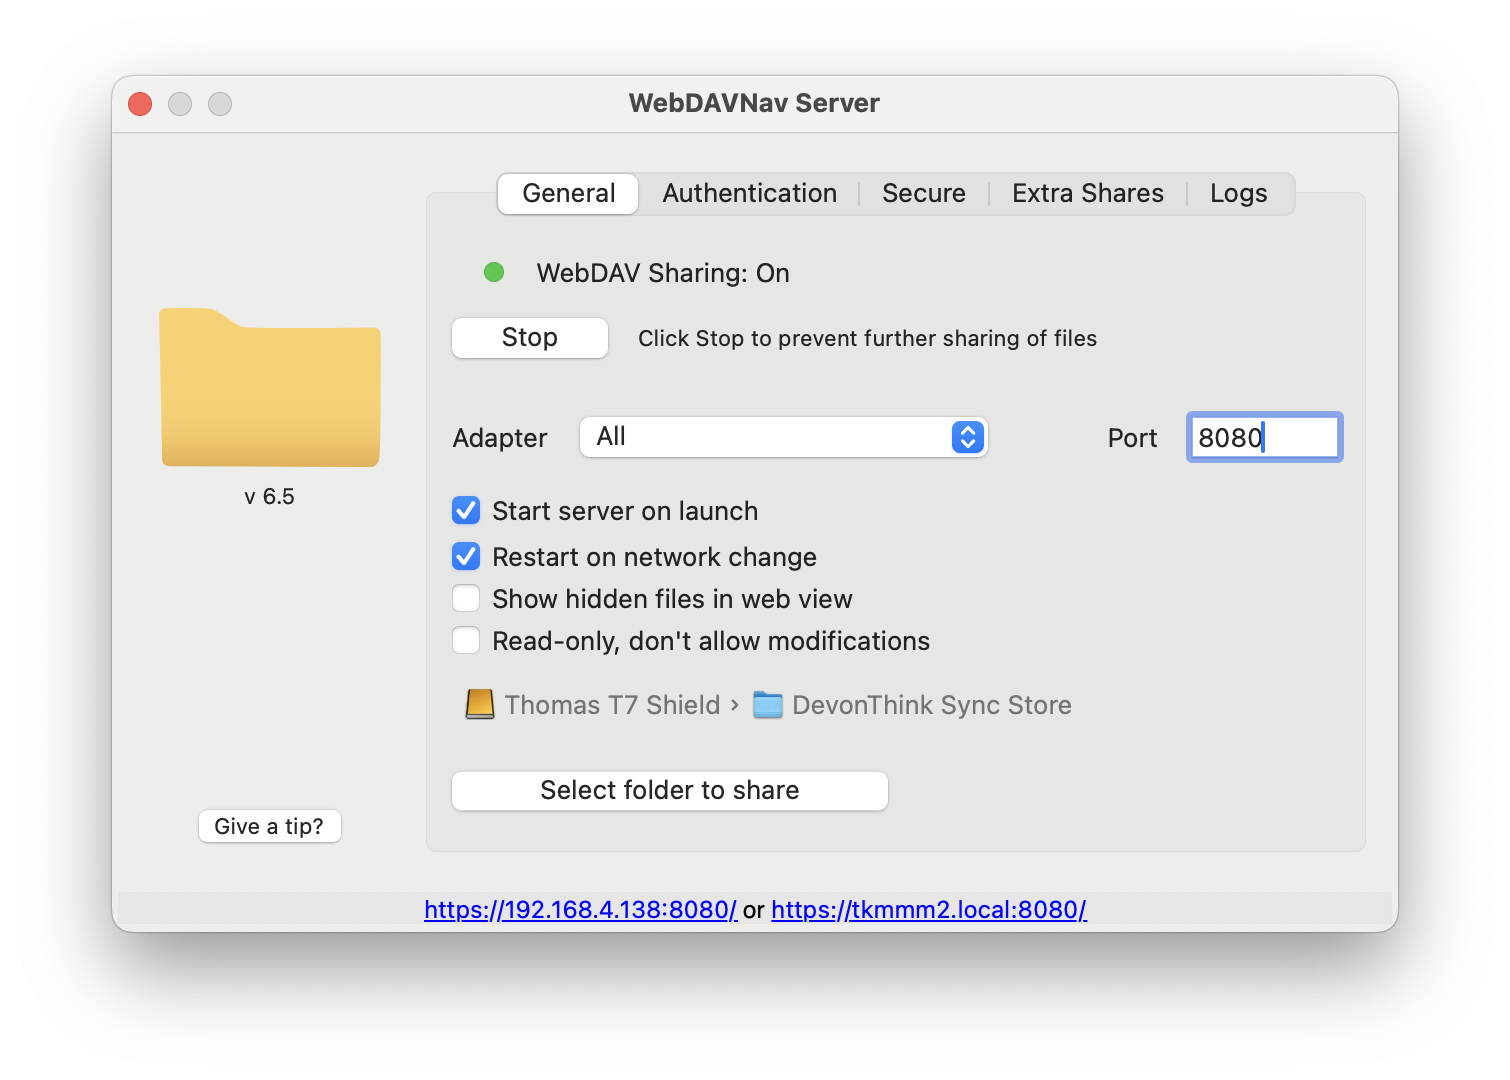
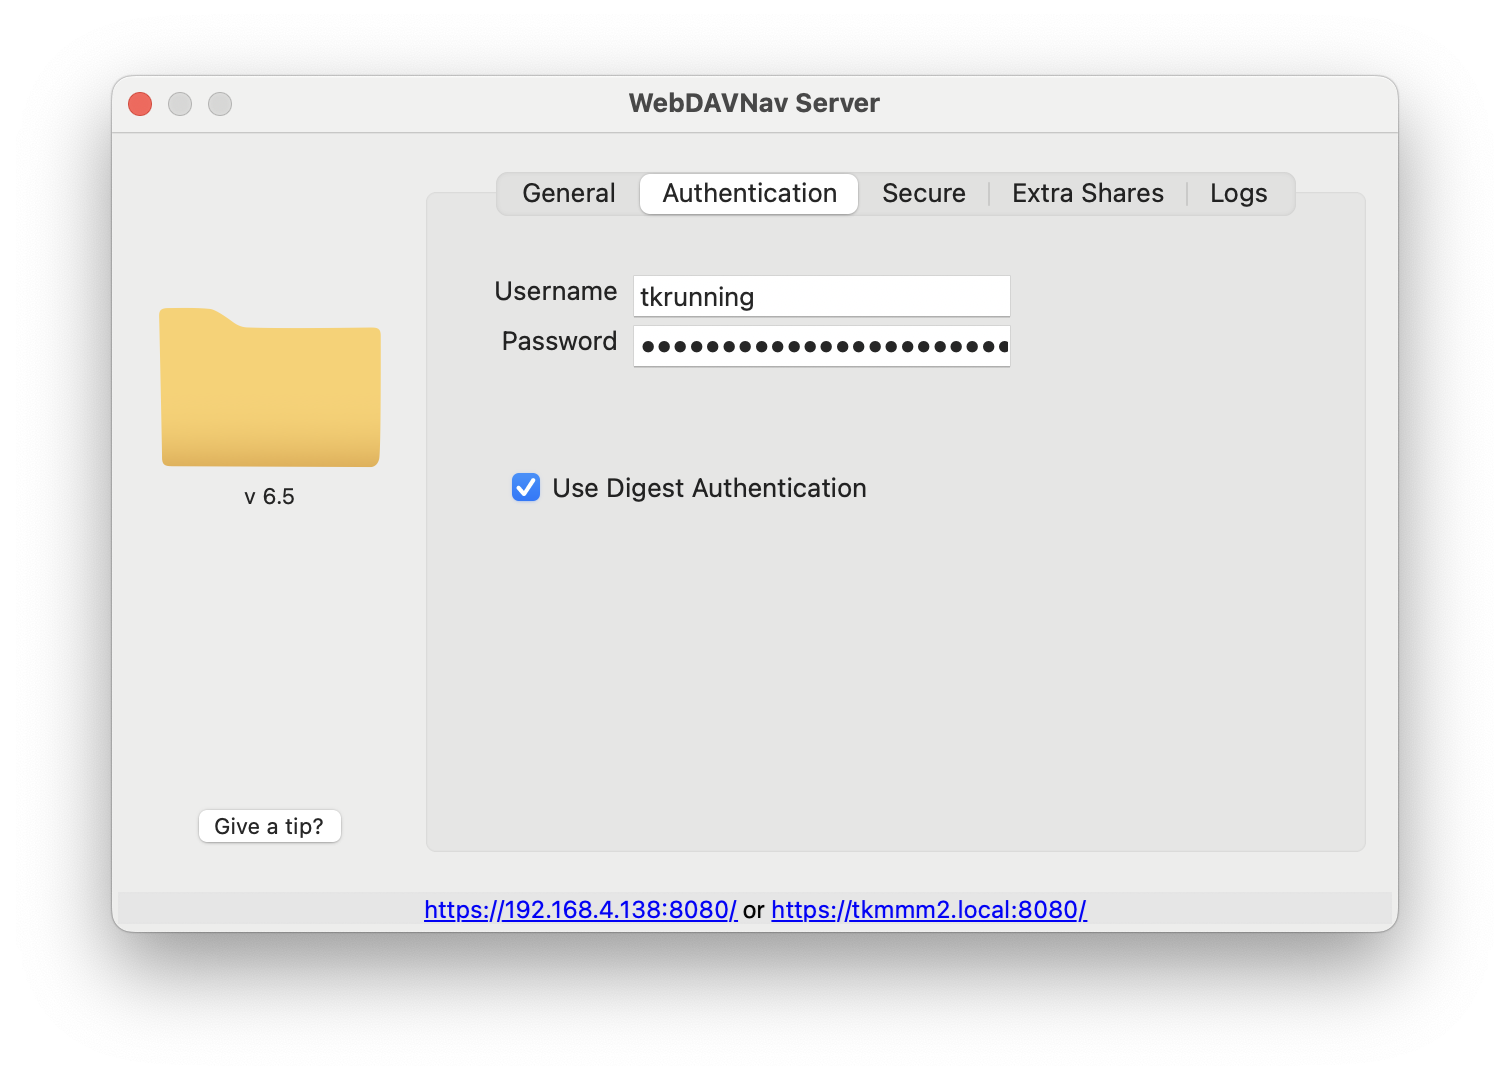
- Setup WebDAVNav Server: Download it from the Mac App Store, launch it, fill in the settings (HTTPS with a self-signed certificate is your call—but remember, we’re using Tailscale’s encrypted network so there’s strictly no need). Still, set up a username and password!
Here are my settings:
-
Install Tailscale: Get Tailscale on all your macOS and iOS devices syncing with DEVONthink, including the Mac you’re using as a server (even if you won’t run DEVONthink on it). Jot down the Tailscale IP address of your Mac Mini—you’ll need this in the next step.
-
DEVONthink Configuration: On your primary Mac (where you have all your DEVONthink databases), dive into DEVONthink’s settings (
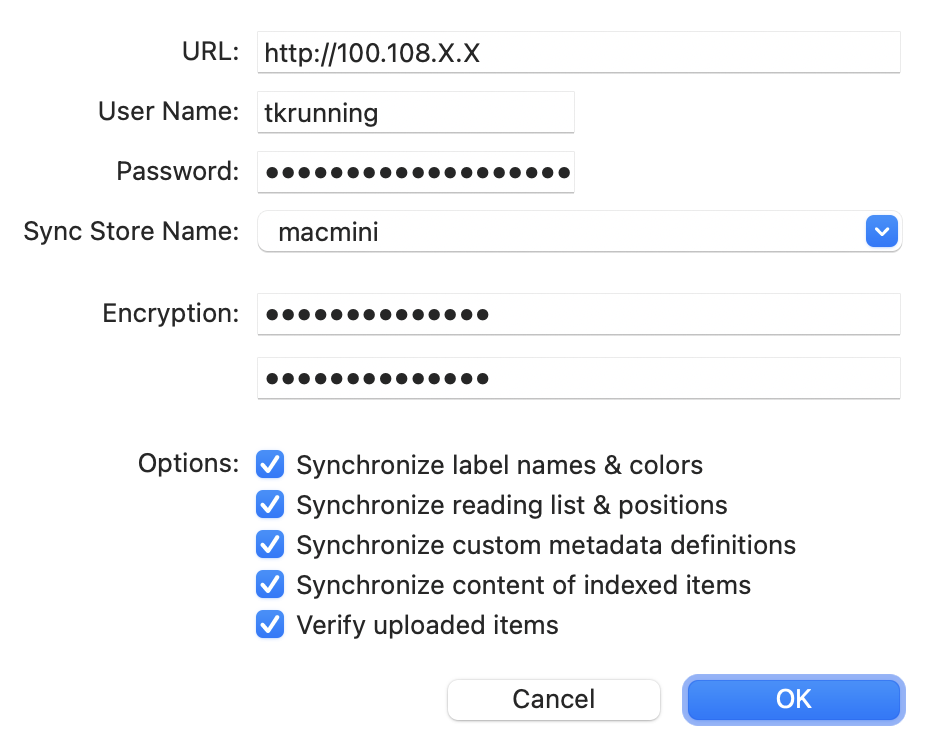
Settings>Sync>Add WebDAV Server). Use the Tailscale IP address for the URL (prefix it withhttp://orhttps://depending on whether you enabled that in WebDAVNav), and the credentials you’ve just set. If you used HTTPS you’ll see a warning that the SSL certificate can’t be verified, which is OK. Don’t forget to enable and securely store an encryption key.
The settings will look something like this:
Don’t forget: You’ll need to be connected to Tailscale for the sync to work!
Then select each of your databases you’d like to sync.
Finally, repeat for each macOS and iOS device you want to keep in sync.
- Optional Bonjour Sync: Keep it around for nostalgia or ditch it—WebDAV syncs lightning-fast over Tailscale while on the same network. It took me less than minute to sync all my databases.
That’s it! Enjoy syncing DEVONthink easily and securely from wherever you are in the world.